1.필수패키지 설치 # yum install gcc* ncurses-devel cmake 2.계정추가 # groupadd -g 400 mysql # useradd -u400 -g400 -d /usr/local/mysql -s /bin/false mysql 3.설치 # tar xvfz mysql-5.5.29.tar.gz # cd mysql-5.5.29 # cmake -DCMAKE_INSTALL_PREFIX=/usr/local/mysql -DMYSQL_DATADIR=/usr/local/mysql/data -DENABLED_LOCAL_INFILE=1 -DWITH_INNOBASE_STORAGE_ENGINE=1 -DMYSQL_UNIX_ADDR=/tmp/mysql.sock -DSYSCONFDIR=/etc -DDEF..
1.필수패키지 설치 # yum install ncurses-devel gcc* 2.계정 추가 # groupadd -g 400 mysql # useradd -u400 -g400 -d /usr/local/mysql -s /bin/false mysql 3.설치 # tar xvfz mysql-5.1.63.tar.gz # cd mysql-5.1.63 # ./configure --prefix=/usr/local/mysql --localstatedir=/usr/local/mysql/data --with-mysqld-user=mysql --with-extra-charsets=all --with-plugins=max --enable-thread-safe-client --with-charset=utf8 # make && ..
1.필수패키지 설치 # yum install ncurses-devel gcc* 2.계정 추가 # groupadd -g 400 mysql # useradd -u400 -g400 -d /usr/local/mysql -s /bin/false mysql 3.설치 # tar xvfz mysql-5.0.96.tar.gz # cd mysql-5.0.96 # ./configure --prefix=/usr/local/mysql --localstatedir=/usr/local/mysql/data --with-mysqld-user=mysql --with-extra-charsets=all --enable-thread-safe-client --with-charset=utf8 # make && make install 4.설정 #..
※ CentOS 7 환경으로 설치 진행 1. 필수패키지 설치 진행 # yum -y install gcc* openssl* 2. apr 설치 및 apr-util 설치 # tar xvfz apr-1.5.1.tar.gz # cd apr-1.5.1 # ./configure # make && make install # tar xvfz apr-util-1.5.4.tar.gz # cd apr-util-1.5.4 # ./configure –with-apr=/usr/local/apr # make && make install 3. httpd-2.4.34 설치 # tar xvfz httpd-2.4.34.tar.gz # cd httpd-2.4.34 # ./configure --prefix=/usr/local/apache --..
※ CentOS 7 환경으로 설치 진행 1. 필수패키지 설치 진행 # yum -y install gcc* openssl* 2. httpd-2.2.23 설치 # tar xvfz httpd-2.2.23.tar.gz # cd httpd-2.2.23 # ./configure --prefix=/usr/local/apache --enable-so --enable-rewrite --enable-mods-shared=shared --enable-modules=so --enable-ssl --with-included-apr --with-mpm=worker # make && make install 3. httpd 설정 # vi /usr/local/apache/conf/httpd.conf 아래 내용 주석처리 해제 Serve..
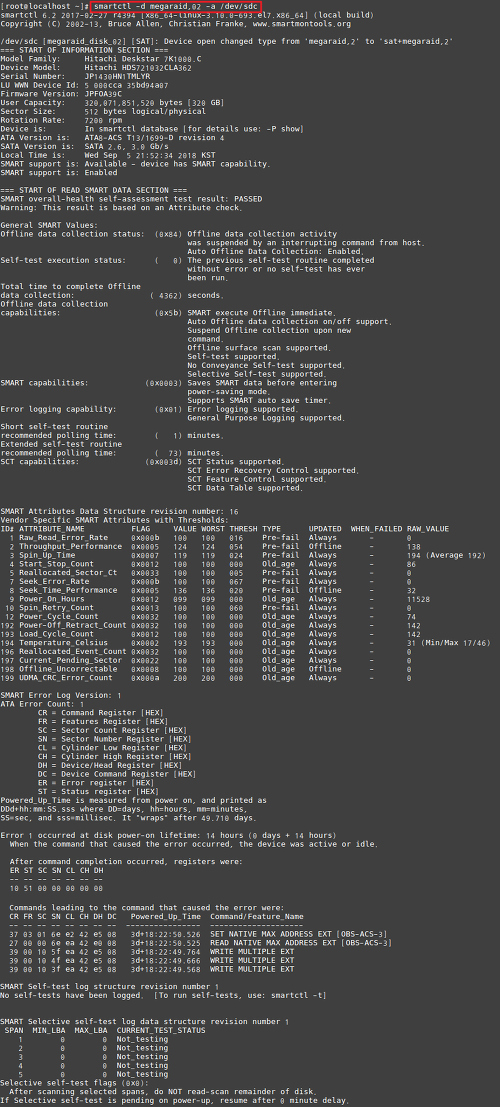
레이드 디스크의 경우 smartctl로 검사할 때, 옵션을 통해서 검사할 수 있습니다. LSI MegaRAID 디스크 검사 smartctl -d megaraid,02 -a /dev/sdc 3ware 디스크 검사 smartctl -d 3ware,02 -a /dev/sdc 여기서 레이드카드 뒤에 붙는 숫자는 레이드 디스크의 순번을 뜻합니다.
※ 디스크는 동일하게 테스트 진행했습니다. 1. RAID 0 2. RAID 1 3. RAID 5 4. RAID 6
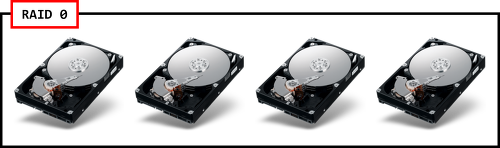
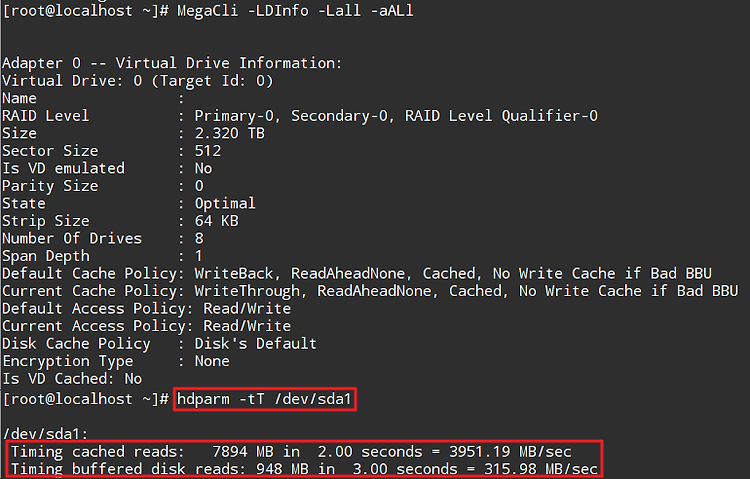
※ 테스트 진행환경 : 디스크 4개 1. RAID 0 RAID 0의 경우 모든 디스크의 데이터가 분산됩니다. 아래 사진은 RAID0으로 묶여있을 때 상황입니다. 상태는 Optimal로 되어있습니다. 이때 디스크 1개가 고장이 났으면, 레이드는 깨지게 됩니다. 레이드의 상태는 바로 Offline 상태가 되며, 디스크 안에 있는 데이터를 사용할 수 없게 됩니다. 2. RAID 1 RAID1의 경우 모든 데이터가 미러링됩니다. 즉, 똑같은 데이터가 각 디스크에 들어가게 됩니다.아래 사진은 RAID 1으로 묶여있을 때입니다. 상태는 Optimal로 되어있습니다. 이때 디스크가 1개가 나가게 되면, 상태는 Degraded가 됩니다. 이때는 리빌딩이 가능하며, 데이터 읽기쓰기가 가능합니다. 3. RAID 5 RAI..