반응형

* Ubuntu 18.04 설치 진행
1. DB 설치 및 설정
$ apt-get install mariadb-server mariadb-client mariadb-common
$ systemctl start mariadb
$ systemctl enable mariadb
$ netstat -nltp
Active Internet connections (only servers)
Proto Recv-Q Send-Q Local Address Foreign Address State PID/Program name
tcp 0 0 127.0.0.53:53 0.0.0.0:* LISTEN 612/systemd-resolve
tcp 0 0 0.0.0.0:22 0.0.0.0:* LISTEN 762/sshd
tcp 0 0 127.0.0.1:3306 0.0.0.0:* LISTEN 28842/mysqld
tcp6 0 0 :::22 :::* LISTEN 762/sshd

$ mysql_secure_installation
NOTE: RUNNING ALL PARTS OF THIS SCRIPT IS RECOMMENDED FOR ALL MariaDB SERVERS IN PRODUCTION USE! PLEASE READ EACH STEP CAREFULLY!
In order to log into MariaDB to secure it, we'll need the current password for the root user. If you've just installed MariaDB, and you haven't set the root password yet, the password will be blank, so you should just press enter here.
Enter current password for root (enter for none): OK, successfully used password, moving on...
Setting the root password ensures that nobody can log into the MariaDB root user without the proper authorisation.
Set root password? [Y/n] y
New password: Re-enter new password:
Password updated successfully!
Reloading privilege tables.. ... Success!
By default, a MariaDB installation has an anonymous user, allowing anyone to log into MariaDB without having to have a user account created for them. This is intended only for testing, and to make the installation go a bit smoother. You should remove them before moving into a production environment.
Remove anonymous users? [Y/n] y
... Success!
Normally, root should only be allowed to connect from 'localhost'. This ensures that someone cannot guess at the root password from the network.
Disallow root login remotely? [Y/n] y
... Success!
By default, MariaDB comes with a database named 'test' that anyone can access. This is also intended only for testing, and should be removed before moving into a production environment.
Remove test database and access to it? [Y/n] y
Dropping test database... ... Success!
Removing privileges on test database... ... Success!
Reloading the privilege tables will ensure that all changes made so far will take effect immediately.
Reload privilege tables now? [Y/n] y
... Success!
Cleaning up...
All done! If you've completed all of the above steps, your MariaDB installation should now be secure.
Thanks for using MariaDB!


$ mysql -uroot -p
MariaDB [mysql]> update user set plugin='mysql_native_password' where user='root';
MariaDB [mysql]> update mysql.user set authentication_string=password('패스워드') where user='root';
MariaDB [mysql]> flush privileges;

$ mysql -uroot -p'패스워드' -e "create database zabbix character set utf8 collate utf8_bin;"
$ mysql -uroot -p'패스워드' -e "grant all privileges on zabbix.* to zabbix@localhost identified by 'zabbixDB패스워드';"
$ zcat /usr/share/doc/zabbix-server-mysql*/create.sql.gz | mysql -uzabbix -p'zabbix' zabbix
$ mysql -uroot -p'패스워드' zabbix -e "set global innodb_strict_mode='ON';"
2. Zabbix 설정
$ vi /etc/zabbix/zabbix_server.conf
DBPassword=zabbixDB패스워드

$ systemctl restart zabbix-server zabbix-agent
$ systemctl enable zabbix-server zabbix-agent
Synchronizing state of zabbix-server.service with SysV service script with /lib/systemd/systemd-sysv-install.
Executing: /lib/systemd/systemd-sysv-install enable zabbix-server
Synchronizing state of zabbix-agent.service with SysV service script with /lib/systemd/systemd-sysv-install.
Executing: /lib/systemd/systemd-sysv-install enable zabbix-agent
# 언어셋 설정(선택사항) : ZABBIX 설치 시 한국어 선택하려면 언어셋을 추가해야합니다.
$ dpkg-reconfigure locales
Generating locales (this might take a while)...
en_US.UTF-8... done
ko_KR.EUC-KR... done
ko_KR.UTF-8... done
Generation complete.


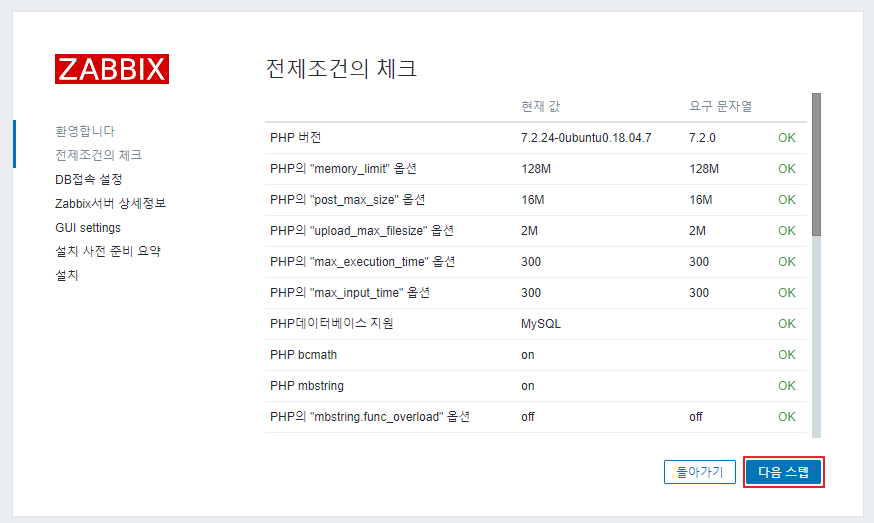
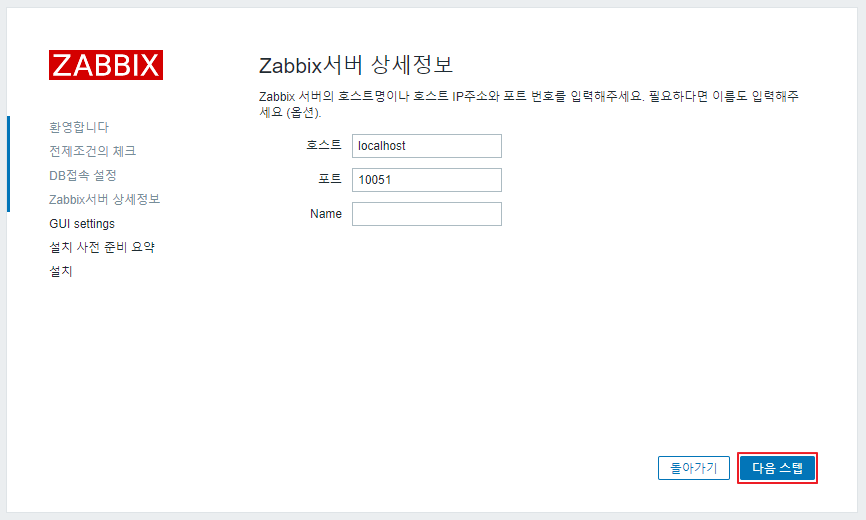
3. 홈페이지 접속 후 설정
http://ip/zabbix 로 접속하면 됩니다.


반응형
'MONITORING' 카테고리의 다른 글
| [Zabbix] apache 모니터링 (0) | 2021.03.14 |
|---|---|
| [Zabbix] zabbix-agent 5.2 설치 (0) | 2021.03.13 |
| NSClient++ 로 윈도우 서버 모니터링 (0) | 2020.06.30 |
| Nagios Plugin 활용 (0) | 2020.05.12 |
| Nagios 텔래그램 연동 (1) | 2020.05.11 |
