반응형

1. Zabbix-agent 패키지 설치
$ wget https://repo.zabbix.com/zabbix/5.2/rhel/7/x86_64/zabbix-release-5.2-1.el7.noarch.rpm

$ rpm -Uvh zabbix-release-5.2-1.el7.noarch.rpm
warning: zabbix-release-5.2-1.el7.noarch.rpm: Header V4 RSA/SHA512 Signature, key ID a14fe591: NOKEY
Preparing... ################################# [100%]
Updating / installing...
1:zabbix-release-5.2-1.el7 ################################# [100%]

$ yum install zabbix-agent
$ vi /etc/zabbix/zabbix_agentd.conf
Server=10.101.0.9 (zabbix_serverIP)
ServerActive=10.101.0.9 (zabbix_serverIP)
Hostname=zabbix-client

$ systemctl enable zabbix-agent
Created symlink from /etc/systemd/system/multi-user.target.wants/zabbix-agent.service to
/usr/lib/systemd/system/zabbix-agent.service.

$ systemctl start zabbix-agent
$ netstat -nltp
Active Internet connections (only servers)
Proto Recv-Q Send-Q Local Address Foreign Address State PID/Program name
tcp 0 0 0.0.0.0:10050 0.0.0.0:* LISTEN 12565/zabbix_agentd
tcp 0 0 0.0.0.0:22 0.0.0.0:* LISTEN 1075/sshd
tcp 0 0 127.0.0.1:25 0.0.0.0:* LISTEN 979/master
tcp6 0 0 :::10050 :::* LISTEN 12565/zabbix_agentd
tcp6 0 0 :::22 :::* LISTEN 1075/sshd
tcp6 0 0 ::1:25 :::* LISTEN 979/master
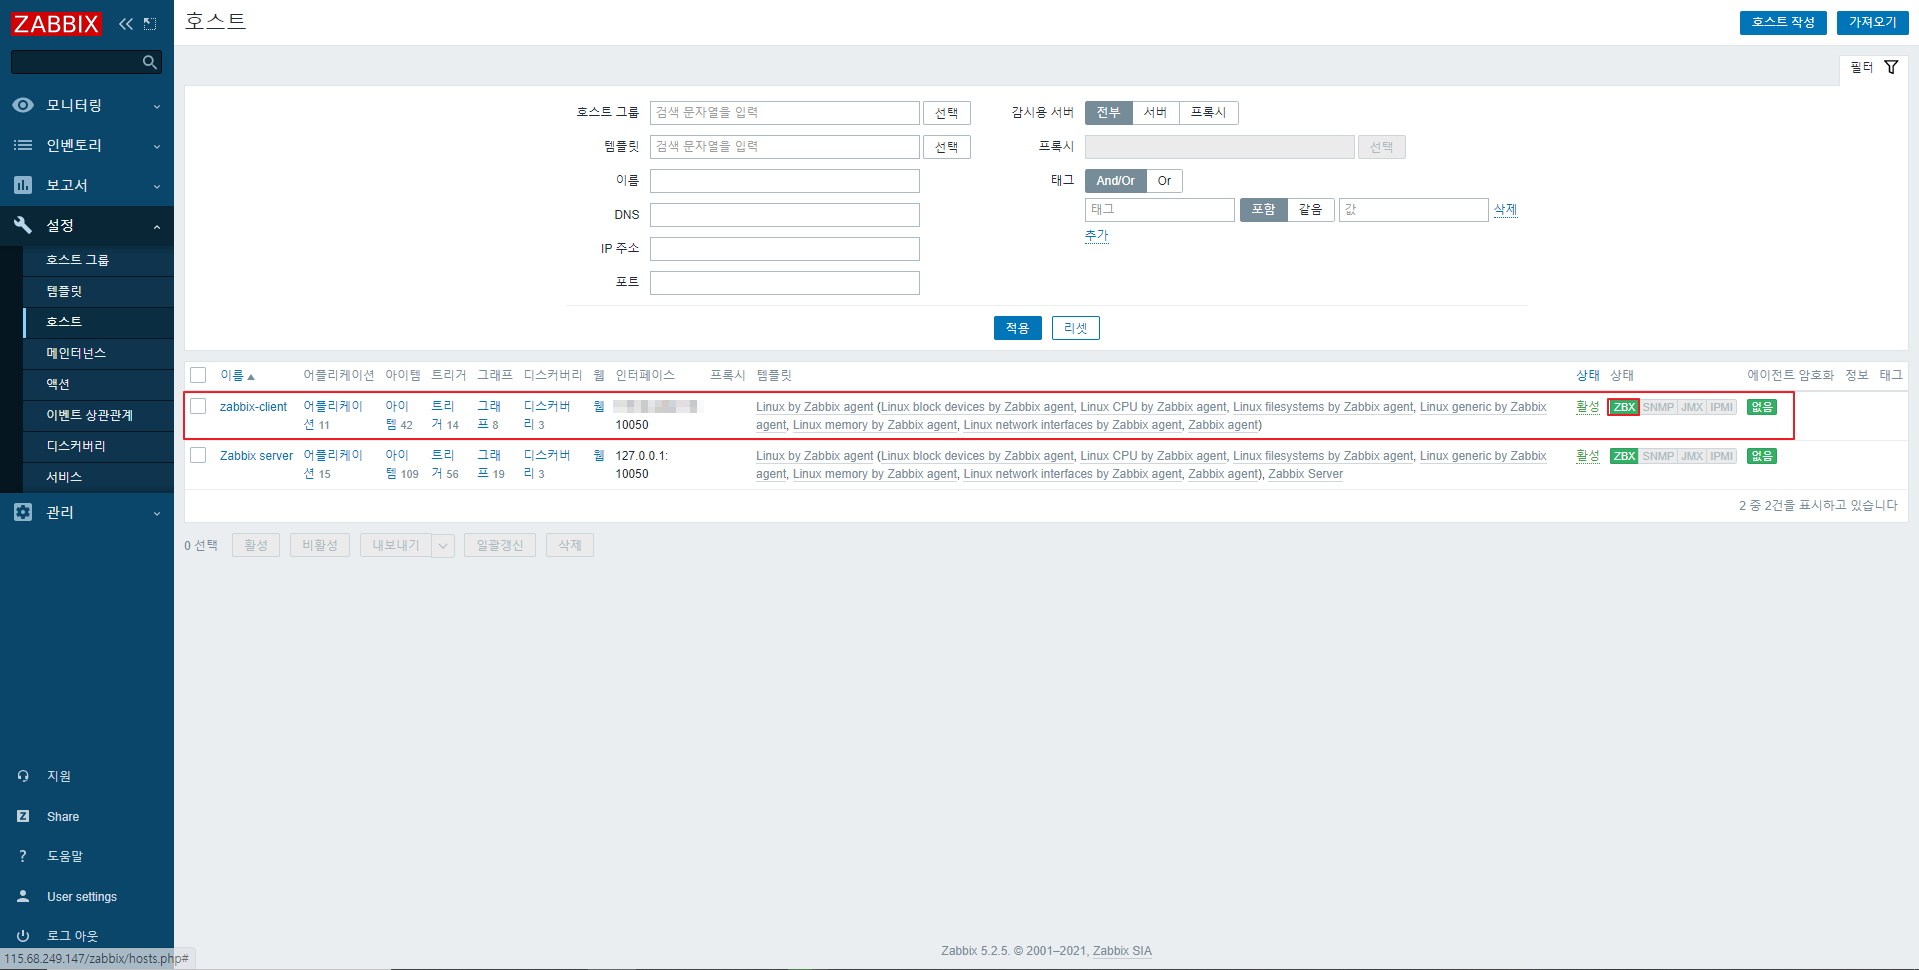
2. Zabbix-server 홈페이지 접속 후 host 등록
zabbix-server 홈페이지 접속 후 host 등록


반응형
'MONITORING' 카테고리의 다른 글
| [Zabbix] telegram 연동 (0) | 2021.03.14 |
|---|---|
| [Zabbix] apache 모니터링 (0) | 2021.03.14 |
| [Zabbix] Zabbix 5.2 설치(ubuntu 18.04) (0) | 2021.03.13 |
| NSClient++ 로 윈도우 서버 모니터링 (0) | 2020.06.30 |
| Nagios Plugin 활용 (0) | 2020.05.12 |
